Sunday, August 14, 2016

Homestead Tour 2016

Hello again! Sorry for the long silence but blogging on a tablet has been a roadblock I haven't wanted to deal with. But, I am back, jumping the roadblock to make this post. I have arranged for a "Permaculture Consult" with Nick Ferguson of Home Grown Liberty. If you haven't listened to his podcasts, go check him out. But, first before you go...join us for a walk around the homestead.

 Let's start at the front porch. The tree is a mostly dead dogwood which a friend is going cut down for us. We want to open up the canopy so that we can plant "flowery things" for mom. I would like to extend the driveway up closer to the ramp. I would also like a gravel area for sitting...room for company since we don't have much room inside for entertaining.

Scanning to the right (eastward). This is the largest lawn area. It is shaded by a very large pecan tree and two other dogwoods. Converting this to food production will require strategic planning so that it "looks pretty" for mother.


The bushes under the window are gardenias. Momma wants more so learning to propagate them would be helpful. Back and to the left of the corner of the house you can see the trunk of The Great Leaning Pecan Tree. The row of evergreen bushes in the distance are the back-neighbors boundary markers.

Spinning around (don't get dizzy!) to the west, you see another gardenia bush on the corner of the house. Beyond is one of the oak trees, the "Christmas Tree" and beyond that the annual garden.


Scanning to the right again, the two other oak trees. We have been advised to have the one in the foreground removed. If we can get it done affordably it would open the tree canopy so we could get more understory plants growing.


Once more..to the right and back almost to the driveway, another section of lawn and a mulberry. Care needs to be taken in this area as the water line runs up this side. The water line is fairly close to the surface.

Okay, next, let's walk down the ramp to see what is just around the corner of the house.

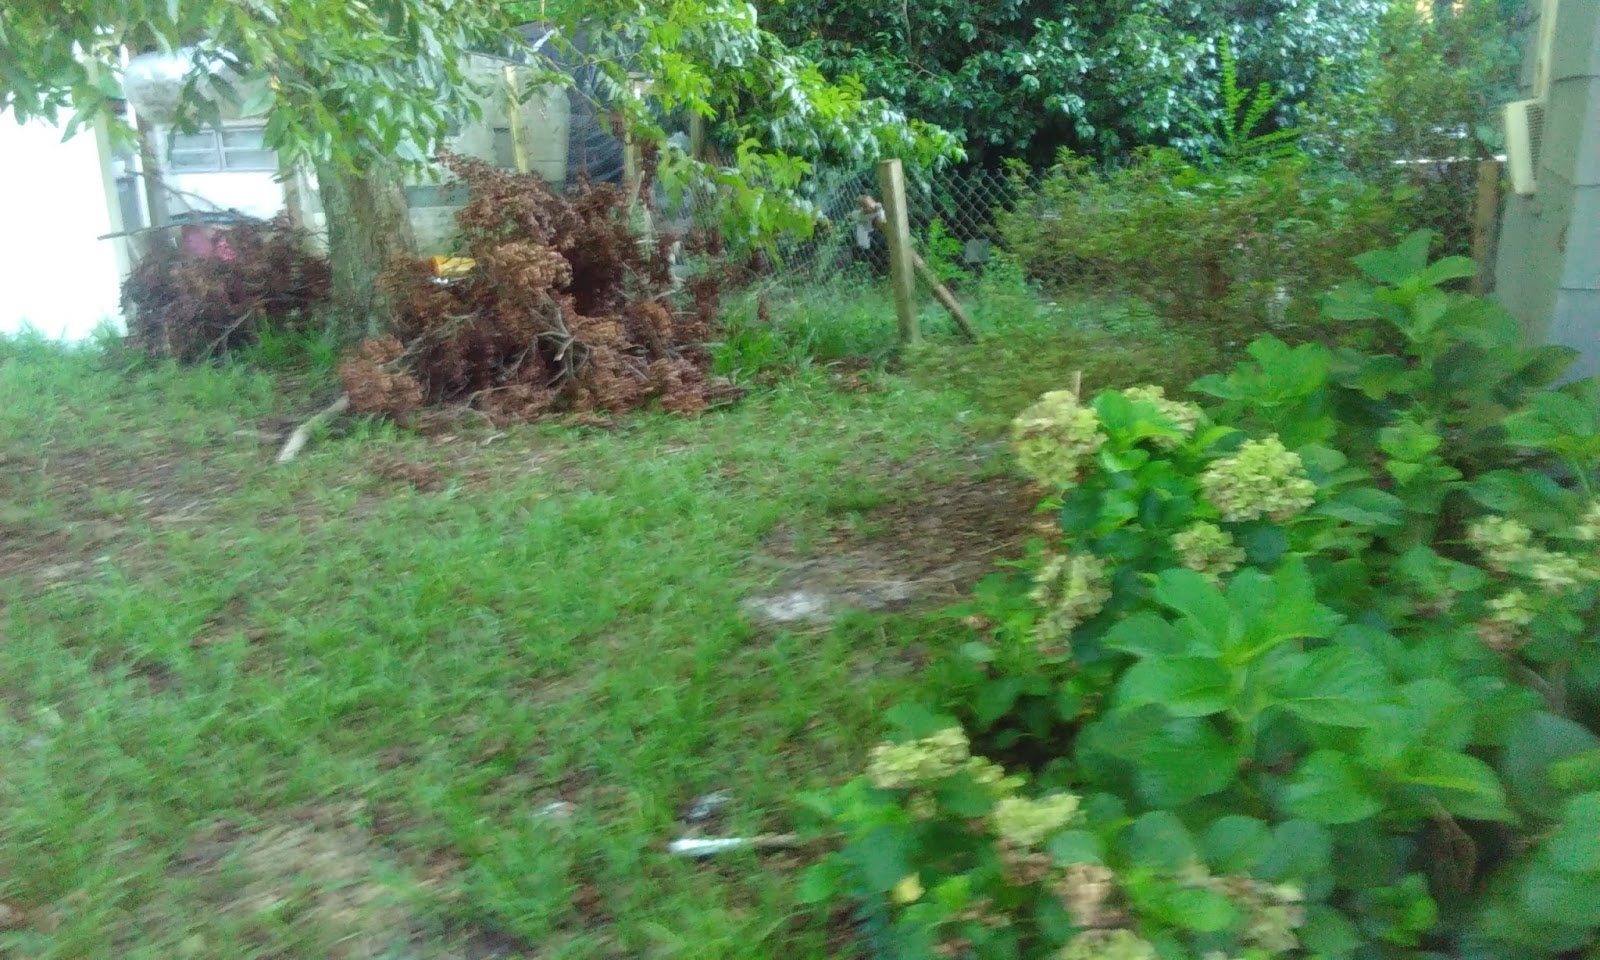
Here is a little "secret garden" tucked into a niche. Along the house (right side of picture) are hydrangeas and azaleas. There is a chain link fence but no gate (which is a total pain). The brown pile is pecan branches that have fallen. The tree is pecan #3. This area gets only a little sun.


Okay, now for a view from a different angle: the end of the driveway (left to right or east to west).
The white fence was put up by the back neighbor to hide our "junk".


The ditches were glysophated by friends trying to be helpful since I can't keep the ditches cleaned out. In the last picture where you see overgrowth in the ditches is the neighbor's ditch.

 Now, standing at the NE corner of the property looking south. In the foreground are my rugosa roses which are just starting to take off after 4 years. I had hoped for a hedge of them and then to build off that with fruit trees and herbs and other food plants.
The southeast section of the property. The posts were going to be for muscadines. The muscadine vines did not survive and the posts didn't get cemented in. Now, two volunteer sweetgums make it necessary to move the muscadine trellis a little north. On the right along the fence are knockout roses. On the left back are the blackberry bushes.

 The blackberries have done very well. I have a couple cattle panels and this Fall will use them to trellis the bushes so it will give some control and make harvesting easier.
 The elderberry forest! There are mulberries in there, too. I totally failed to account for mature size! Oh my. I am hoping to relocate some or all of the elderberries to the southwest section. That will make it possible to net them and improve harvest.
A perfect picture of the contrast between the back-neighbor and me. His formal evergreen trees on his side of the line and my elderberries on my side.
The black vinyl tarp covers my rabbits/duck-geese night pen. The tree to the left is the camellia under/around pecan #4. Both provide critical temperature control for the rabbits.

A portion of the yard behind the house is fenced for our dogs. I want to fence the east and west thirds for duck-geese pasturing and leave the front center unfenced. It would be nice to have some flowering bushes along this fence...perhaps some gardenias to add fragrance as well.


Corner of the fenced area: there is a volunteer pecan which I want to remove. Then, three mulberry trees in a row along my southern property line.
Beyond the mulberries and still along the southern boundary, my untamed area. Cannas and weeds rule here and filter our laundry greywater.

On the other side are some bush willow in need of rescue.
From the southwest corner, you see the untamed area merging with the garden. The butternut squash vines going crazy over all. Harvest should be interesting!

The grassy line on the left is where I want to move the elderberries. A few starts have been planted in the foreground area.


Here are pictures of the annual garden area. Eventually, I want to have it all covered with wood chips.

 Just right of center is a sapling peach tree. I am going to try growing some from pits...we love peaches.


And lastly, are the Santa Rosa Plums located in the northwest section. They flower but so far no fruit. I would like to cover in wood chips and add perennials and annuals to this area. 

 Oh, almost forgot the west side of the house (between house and annual garden). This is the Holly tree that serves as the killing tree (rabbit dispatch that is).

There is an antique rosebush near this tree and shaded by it. It is losing the battle against some other plant trying to overgrow it. I need to propagate it quick.

That concludes the tour. The souvenir shop is closed but we do have duck eggs available.


Thursday, September 10, 2015

Best Laid Plans and Focusing on Zone Zero

Best laid plans.... so much for posting weekly and following the "Gardening Week-by-Week" book. I got off track but for a good reason! As some of you know, back in April, Momma headed to Florida to visit her momma and sisters. In her absence, there was some surprises afoot.

In Permaculture, Zones are The KEY to all things planning. Zone Zero is the home, Zone 1 is the space around the house that you can get to easily for gathering a quick herb for the kitchen without getting soaked if it is raining, Zone 2 is the next area…and so on. When you read about permaculture design, usually they start with talking about Zone 1--designing from the doorstep outward. Zone Zero gets little attention.

Well, April to mid-July forced me to stop focusing on Zones 1 & 2 and turn inside to Zone 0 -- our home. We had tried to finance a mobile home but were turned down. I had knocked on every door I could think of to get help with making our home safe in general and especially for my elderly mother. When she left home, she expected to return to the same broken down home. The trip wasn't expected to be more than a few weeks or a month at most. What she didn't know was that while she was gone, friends and a few very special Baptist Men came in and worked on making some major repairs to our house. I had to refocus off the gardens and onto decluttering, painting, and dealing with life in a construction zone. It was all very worth it and Mother was very surprised about what she found when she finally came home mid-July.

Zone Zero – the home. The place we gather as a family to seek warmth and comfort. Our spirits as well as our bodies are sustained and supported by what Zone Zero provides. The kitchen is a big part of Zone Zero as it is the “center” – it is where we go multiple times a day, engaging in the timeless rituals we have around cooking, eating, and gaining physical, emotional, and spiritual sustenance. 

What should our goal be for Zone Zero? I think most would agree that the goal is comfort, safety, tranquility. It should be a place where family and friends like to gather. An uncluttered place that allows for the uncluttering of the mind and spirit. Just as we hope to create permaculture gardens that others want to enjoy, our Zone Zero should be a place we – and others—want to live in. But, what makes a home comfortable, safe, and full of tranquility? For each person, there will be a different answer -- but it is important to ask the question.

First, declutter. One of the biggest things I had to do in front of, and behind, the construction work was to declutter. My mother is minor league hoarder. Along with that, at some point this home fell under a grey cloud that seemed to collect "stuff". As stuff collected, the cloud got heavier and more oppressive and harder to fight. Stuff not only clutters the space but it clutters the mind and spirit. So, step one is to declutter. It sounds easy. But Stuff has a way of entwining itself around and through our hearts. We find ourselves keeping things because of the memories invoked. King Solomon wisely stated, "...a time to keep and a time to throw away" and indeed there is a time to throw out the clutter so that the treasures we keep are appreciated and enjoyed more. An amazing amount of useless stuff went into the waste bin and to the curb. With it's departure, and a fresh coat of paint throughout, the cloud lifted and a light and lightness came in.

Making an inviting home: [be] a lover of hospitality, ...sober, just, holy, temperate.... (Titus 1:8) One of the hopes mother and I have is to be able to open our home to friends and guests. We want to have prayer meetings and Bible studies and fellowship meals. We've not done so for a long time because of the condition of the house. We are getting close to a point when we can do that without shame or embarrassment. The desire is there to be hospitable...we just need to get things to a point we can. The Proverbs 31 wife worked with her hands to provide for her family and to create a Zone Zero that was hospitable. I have been realizing that somewhere along the journey of the last decade, I lost consistent practice of arts and crafts that both beautify a home but also feed my soul. This is something I hope to remedy.

Creating a Pantry:  The wise store up choice food and olive oil.... (Proverbs 21:20) I won't get into the argument of whether we should store up 25 years worth of freeze dried food or none at all. That is for each person to decide for themselves. Personally, I don't want to eat MREs for 25 years. I would much rather be able to source food locally. And, as much as possible, I'd like to be able to provide healthy food for my family and friends -- and a good neutraceutical/herbal medicine cabinet. So, this is where we begin to expand our focus to include the other zones of the permaculture homestead plan -- and beyond into the local trade/barter systems you can form. That trade/barter system covers our shortcomings in food production systems within our own homestead. In other words, what I can't manage to grow -- either due to lack of space or lack of skill -- I can trade or barter to obtain.

Some of the things I'd like to have in my food and medicinal/neutraceutical pantry are (**denotes things I need to learn or perfect):
Fermented foods:
Kombucha
Kefir
Sauerkraut**
Pickles / fermented veggies**
fermented garlic**
Smokehouse**:
Fish
Venison
Pork
Rabbit
duck
Larder (cool room—not quite refrigerator but cool enough to keep produce fresher longer):
“root cellar”-ed vegetables**
Canned vegetables, fruits, and meats
Dried mushrooms
candied lemon slices**
rose water**
dried herbs from the garden**
herbed vinegars/oils**
Medicinal/Neutraceutical:
salves/ointments/tinctures/teas**
Elderberry elixir
Muscadine juice
Mulberry juice
Mulberry, Blackberry, Elderberry elixir
Zone 1 & 2 activity during the last four months:

I gifted myself 15 Welsh Harlequin ducklings (females) for my birthday. I lost three before figuring out what the issue seemed to be and corrected the problem. The remaining dozen are doing well. I also gifted myself a quad set of Standard Rex show quality rabbits. This is a breed I didn't think I'd find on the East Coast so when I discovered someone just 90 minutes away, it was a no-brainer.

 I managed to actually harvest my garlic but not my elephant garlic. I hope I can locate their bulbs so that I can replant them for next year. My potato patch did well but I did not get a chance to harvest them. The tomatoes and cucumbers were a disaster. I know that a big part of the failures were because I was not paying attention to the garden. I feel very frustrated and with each passing season and garden failure, I become more convinced that animals and perennials are more my "thing" than vegetable gardening.

Speaking of perennials, my elderberries are doing fabulous! We actually did harvest some this year and made a dozen jelly jars of elderberry syrup/elixir. I will be expanding my elderberry bushes and working to make this a cash crop product. I hope to find other perennial crops that do well without a lot of effort.

Friday, April 3, 2015

Lionesses Working Together

I took this week off to use up leftover vacation time from last year and to get some much needed Spring chores done. It has been a beautiful week weatherwise -- 70's in the day, cool evenings so I was energized to get busy on my to-do list. There were rabbits to dispatch and can, there was rabbit manure to move to around bushes and make beds for my annual garden, the garden to plant, and the birdhouses to finish. 

Wednesday, I was focused on getting covers on the birdhouses I had started previously (see previous blog entry). I've tried getting the covering on before by myself without success. I tried hiring someone to help me, without luck. My Pastor quipped "perhaps God is trying to tell you something" which I wasn't sure how to take. My mother offered to assist me. I was concerned that she might hurt herself but I really needed to get this done and it seemed that God has seeing to it that mom and I would be on our own on this.


So, I had three billboard advertising vinyls sized 10ft x 32ft to cover these three kennels. The point was not to completely cover them as birds are healthier if they are not overly sheltered. The aim was to provide shelter from rain, harsh winds, and predators. The smallest one, in the middle, is almost completely covered because it will be the nursery (brooder). The far one will be for the ducks who need the least amount of protection from the weather and the closest one is for the chickens. 
What I did was attached a rope to one 10ft side and pull it up over the top. But, the knot would get stuck in the panels and Mom's job was to stand inside the kennel with my "shepherd's stick" to push up on the knot and other parts of the vinyl that would get stuck. It took some work and cooperation between us but we managed to get it done. Each vinyl was cut into sections to make the best use for covering the kennels. The vinyls were attached with zip ties. The panel covering the front of the small "nursery" kennel is only partly attached as it covers the door so I can just slip under the panel and through the door.

I tried taking a selfie of Mom and I together but it seems I'm not good at the selfie. But, here is a picture of my lovely mother and Sam the Guardian Cat. Whereever we are in the yard, he is nearby standing--or laying--guard. He is actually one of our feral cats, though he has long since forgotten he is supposed to be feral and afraid of people.

Now, back to that comment by my Pastor that God was trying to tell me something by person after person backing out of helping me with this task. Actually, God was trying to tell me three somethings!

Lesson #1: Let your Mother help you. I was worried about her hurting herself but she wanted to try and since I really needed help, I agreed. She was a blessing. We talked about how we were like lionesses (a'la "Lioness Arising") working together. It meant so much to her to be helpful. I felt we bonded on a new level.

Lesson #2: Listen to your Mother. I had it in my mind what I wanted to do and how I wanted to do it. She ventured to make suggestions. Just as I was about to respond negatively, the Holy Spirit put his hand over my mouth and whispered "listen to her". And, her suggestions were good. Then, I decided to discuss other points of the design that I wasn't sure about to see what she thought. More good ideas. She is actually a pretty smart lady.

Lesson #3: I can do more than I give myself credit for. Perhaps not perfectly but "perfect is the enemy of good" and tends to freeze me like a deer in headlights. Once I break out of that frozen terror, I can manage to get the job done...and if I learn later that an adjustment is needed, I can make the adjustment.

So, the task is done and lessons were learned. Tomorrow it is supposed to rain which will serve as a test of our work. Then, I can get the roosts and nestboxes in the kennels and then the work begins to persuade the birds to use them!

Saturday, February 28, 2015

Lawn-to-Pasture and Bush Willow Pruning/Planting

Spring is around the corner and there is a 1001 chores to get done around the homestead. I did a walk about yesterday morning to see the state of the homestead. I already knew I needed to get to the bush willows and get them pruned back before they came out of dormancy. On the walk-about I discovered come pruning work to do on a couple of the mulberry trees as well as the blackberry and rose bushes. I will also be taking some cuttings from the elderberry bushes to propagate new bushes.

I have been contemplating the transformation of the northeaster quarter of the homestead from lawn to pasture. The idea is to have cut-and-carry fresh grass/weeds for the rabbits and also some dried for winter hay. This morning I venture over to Vereens Turf Center in Longs, SC to get some grass and clover seed. After talking with the helpful ladies there, I settled on a pre-mix of Bahia, Burmuda, Rye, and a few other grasses and a side bag of crimson clover. Five pounds of each. I mixed those with rabbit manure and hand tossed it over the lawn area. I think I could have used more, I really wanted a heavier coverage. Next time I am at Tractor Supply I will pick up a bag of "deer plot" seed and toss it out there as well. Lord willing, it will produce a nice source of food for the rabbits.

Next, it was time to get on those willows or I would lose my chance. So, I took pruners to the 58 bush willows that I planted last year. It seems counter-intuitive to cut them back to stumps again but I'm told that this will stimulate strong growth this year. Last year, I had to leave them alone (no cutting forage for the rabbits) but I should be able to cut forage from the willow this year. I sure hope so because the idea is for the willow to provide a good protein source as well as a coccidiostat effect for the rabbits. From the prunings, I planted an additional 49 willows so that next year, I'll have 109 food producing willows. I have plenty more cuttings which are destined to be mailed off to other BYMR Groupies.

Tomorrow, I'll get to the mulberries, blackberries, and roses.

I'm reading a new book, Food Web: Concept which is the first of a series of books on creating food webs on your homestead to maximize food production with less inputs. It is an exceptional book and I highly recommend it to anyone who wants to get more for less -- more food and more goods to sell for less inputs/costs. The concept is one I've had as a framework for my homestead from the beginning but this book is fleshing out the ideas in ways that have me quite excited with renewed hope that it is really possible.

Now, before I forget: the Week-by-Week Vegetable Gardener's Handbook for the week of February 23rd:

* plant potatoes.--Well, I have ordered potato starts but they have not come. Which considering the amount of rain we've had, I don't think I would be able to plant them now anyway. I am planning to try growing the potatoes in tire towers again. My first attempt a few years ago was a dismal failure but I want to give it one more try before giving up on the idea. Besides, I don't have enough prepared bed space this year for potatoes so doing the towers is my best option.
* propagate rosemary by layering -- if I had a rosemary bush, now would be the time to propagate it by layering (sticking a bottom branch into the soil and pinning it in place until it roots). But, this reminds me that it is also a good time to look for a rosemary bush at the garden centers and plant it.
* hardening off cabbage starts--I don't have seedlings (no space) but this is a reminder that I am still behind the 8-ball to get the raised beds up and ready for planting. If I can get them up soon, I could seed them with my brassicas and be ready with row covers for cold nights.

Sunday, February 15, 2015

The Weather Outside is Frightful

This has been quite a winter so far -- not as bad here as it has been in the Northeast for sure but very rainy. Last night we had winds in the 30-40mph range and it was COLD. In the next few days we are predicted to have a "wintry mix" of weather. The Almanac predicted "Red Flag" weather in the first week of February and so it seems they were right but it didn't stop there! They also "Red Flagged" the middle of March so winter isn't done and any early season planting I do needs to be done with an eye to being able to cover when necessary. But, even with such wintry weather, The gardening season is upon us! I'm feeling the pressure already--too much to do and too little time to do it in.

Per the "Week-by-Week Vegetable Gardener's Handbook" I should have flats of seedlings going weeks ago. Well, I am just not able to do flats of seedlings currently. I need a greenhouse for that but that will be next year at the soonest. This year, we still either direct seed or we buy starts. Other than that, let's see how I'm doing on the weekly plan:

Week 8 before Average Date of Last Frost (February 2nd for my area):
  • remove half of the mulch from the garlic (and strawberry) bed if there is signs of growth. No strawberry bed this year but I do have a garlic and onion bed that I planted in the Fall. No signs of growth with the onions but the garlic had started growing in the Fall but has not grown much since. After this week's cold, I'll begin uncovering the garlic. 
Week 7 before Average Date of Last Frost (February 9th for my area):
  • Raised beds. As soon as I get the birds moved (soon, Lord, please!) I will build a couple of raised beds in the back yard. Having the annual vegetable garden closer to the back door will make it easier to maintain and harvest. The other areas of the yard will be for mostly perennials (except for some vining crops that will need trellising). 
  •  Pea & Spinach. I need to get spinach seeded in the next week or so. I won't have the raised beds built but I do have the tires I can set up for planting.
  • Carrots & beet. Time to be sowing these outdoors as well. I had not intended to plant annuals around the plum trees again but since the raised beds are not ready, I may need to use those beds for one more season.
  • Soil. Work the soil--work in amendments and/or cover crops. I am working to spread the tree shreds/mulch I received this winter. I am spreading it thick a la "Back to Eden" garden fashion. Once I have it spread, I want to top dress with rabbit manure and other amendments and then let it set for a season or two before planting into it. 
Week 6 before Average Date of Last Frost (February 16th for my area):
  • Onions. Sow seeds outdoors if soil is workable. I did sow some onion seeds last Fall. I have more that I did not sow. As soon as the weather is better, I need to get the rest of the onions planted.
  • Chard, kale, carrot, radish, beet, turnip, kohlrabi, parsnip. Sow outdoors in prepared garden soil. I recently discovered that I really like chard so I need to order seed. As soon as possible, I need to get these cool season vegetables sown outdoors in hopes of a good season. 
In addition to these pressing issues are pre-existing issues and new ones caused by the strong winds of the last week. I need to get the birds into their new housing and their new run fenced in so I can turn my attentions to the rabbitry. Moving the rabbits was --until this week-- more an issue of wanting more space to have more rabbits. The high winds have damaged the rabbit shed roof and pushed the urgency of getting the rabbitry up several notches.


Sunday, February 8, 2015

Creating New Chicken Coop and Duck Houses

So, I've been aiming to get new housing for the chickens and the ducks. I was able to get 3 dog kennels off of Craiglist and the question was --  "How to put a roof on them?"

The answer to that question depended on whether I would have help or not. Just two weeks ago, I thought I had help in the form of a young man with time on his hands. He was going to build a "carport" style cover for the kennels that would allow for moving the kennels under the roof if desired. Nice. Cost: $300 including his labor. I planned to pay more like $350 as he was underpricing his labor.

But, he decided that hangin' with his friends was more his cup-of-tea and he backed out. Gave an excuse that I actually believed until his mother gave a different excuse to our friend who had made the connection between us and the young man. Ah, so they both were being dishonest. Shame on them.

So, I was left without assistance and no more patience for trying to find someone with the desire to work. I decided to do what I could do single-handed. So, I decided to go with cattle panels and highway advertising vinyls. The upside of this is that not only will I grow my self-confidence but I will get these three kennels covered AND the larger kennel that will be the new rabbitry done for about $400 including two extra panels for using as trellis in the garden. A very good bargain!

Cattle Panels (aka Feedlot Panels) are 16 feet long by 3.5 feet wide. They are commonly used to make hoophouses and field housing for goats and pigs. The challenge is in transporting them from the Tractor Supply Store in Whiteville to the house. I have one friend with a good sized trailer that I could call on to help--hopefully. I offered to pay him for his gas and time to assist me in the transport and he took me up on it. So, 15 panels made their way to the homestead last weekend.

Highway advertising vinyls are the used advertising signs you see on the highway billboards. They are made of thick vinyl and are...well...big! I have three that are 10'x32' that I got free from a local sign shop. Expect to pay for them, though. My source realized after they gave me these for free that there is a market for them and now they charge $25 each.

Yesterday was a warm, sunny Saturday and I could actually walk around without sinking in mud so it was time to get started. I was on my own. My goal was to get the three kennels destined to be a chicken coop and duck houses ready to be covered with the billboard vinyls.

The first kennel is 6'x9' and the the gate is on the 6 foot side making the only direction a cattle panel roof could run would be from 9' wall to 9'wall. That would be too sharp a curve for the cattle panels. Fortunately, I had an extra kennel wall section that came with the kennel. This would become the roof support for this kennel. I wanted a slant to the roof so I fetched an extra metal fence post I had and strapped it to one of the 9' top bars. Then, lifted the extra kennel panel up and strapped it down -- one side lifted by the extra fence post. Then it was time to start working with the cattle panels.

Cattle Panels on the Chicken Coop
Cattle panels are not heavy so much as unwieldy.  The first couple in the 8x12 kennel were pretty easy. The panels would run from 8' wall to 8'wall which is the ideal "bend" for these when doing hoophouses. I was thinking that there should be room to easily fit three panels with a bit of space between them. Either the kennel is not truly 12 feet long or the panels are wider than the 3.5' because I had to overlap panel two and three. Thus, the third one was more of a challenge because it required trying to get it up and over the top, under the second one, and into position to attach and it was a tight fit. I got it with a bit of effort and once done, I was winded and needed a rest.

Then, it was time to do the 10x10 kennel. Panel 4 (1st panel in the 10x10) was ridiculously hard. First, I approached it from the wrong side and trying to turn the panel 90degrees was annoyingly harder than it should have been. Perhaps I was just getting tired. I didn't give up and finally got it into position and strapped in place. The bow was a bit odd for reasons I don't know but that won't affect it's job as roof support. Another rest to catch my breath and then on to panel 5, the last one of the day.

About this time, my redneck neighbor strolls over being nosy. Never offers to help me. Just talks about how many eggs his hens are giving him daily while I am dragging the panel around -- to the correct side this time -- and then up and over the top of the kennel. Somewhere in that process he fades off and leaves and I continue with my task at hand. Strap it down--it has a more normal bow shape-- and I'm done.

Last night, we lost Gracie the Pekin duck I rescued a few months ago. She was out free ranging with the Muscovies. When they came back, she couldn't figure out how to get back in the gate with them. When I tried to direct her, she panicked and went into the woods. This morning, all that was left was white feathers. I am aiming to order some ducklings but this was a harsh reminder of why I am working to get the duck houses built. I will put up some yard fencing around their new area as well and then get a portable electric fence for when I want to let them free range. And, my new ducklings will be trained not to be afraid of me and to let me herd them. Poor Gracie was too traumatized by her previous owner to let me close and too dumb to follow the muscovies lead.

Sunday, January 4, 2015

Frost Dates

One of the first things a gardener must do is figure out their "frost dates".  You need to know what the "last frost day" and the "first frost day" are for your garden. For some reason, this always gives my blonde brain a bit of exercise. My first thought is always that "last" means end of season rather the beginning of the gardening season. So, my way of keeping myself straight on this matter is:

The Last Shall Be First


So, how does one discover when their frost dates are? The Farmer's Almanac has a Frost Date table but if you don't live in one of the listed cities, it is not as accurate. It may suffice but there are also websites that will calculate it for you by zip code. Dave's Garden has one --simply put in your zip code and they give you the Last and First Frost Dates for 50% chance of frosts and dates for only a 10% chance of frost.

For example, for my area the average (50%) risk of frost is from November 5 through March 30. Meaning, that my Last Frost Date in Spring is March 30 and my First Frost Date in the Fall is November 5. I also learn that there absolutely will be frost risk from November 25th through March 13th. So, if I want to plant as early as March 13th or grow after November 5th, I need to have row covers to protect against frosty nights. But, in actuality, I need to have row covers or cloches available from March 30 to April 17 because there is a smaller risk of frost in that time period and also from October 17 to November 5th. Lastly, I'm advised that my garden growing season is roughly 220 days.

Next, I take this information to my new Week-by-Week Gardening Journal and start plugging in my dates. Counting back from the March 30th date of last frost, to the journal's starting point -- 20 weeks prior -- and I realize that I'm already way behind! Gasp! The Spring Garden actually starts at the end of November the previous year! Fortunately, These early weeks are gardening planning that I can get caught up with (hopefully) so that I actually plant out my Spring garden ON TIME this year.

Tasks for this week:
  1. catalog my existing seeds
  2. get a replacement glass tube for my rain gauge